Showing posts with label crafty frugal. Show all posts

January 18, 2013

Book Review: The Modern-Day Pioneer: Simple Living in the 21st Century

Are you a modern-day pioneer? Or are you like me and just aspire for a simpler pioneer way of living?


To me, pioneer living is synonymous with frugal living and that means savings in my bank account. And, who doesn’t love that!

Author, Charlotte Denholtz, is a woman after my own heart! She lives in Vermont with her family. My family and I live in New Hampshire, and this book is full of practical knowledge that is useful to New Englanders.

In the past, I have dabbled with some of the topics this book touches on but never fully mastered them. For instance, Charlotte has entire chapter on gardening. I have tried year after year having a large vegetable garden but I haven’t had the best luck. I am always excited to start the seedlings indoor (they do very well) but they never thrive outside. Charlotte, shares ways for container gardening and raised bed gardening. Last year, my flower garden did great and so did my herb garden. Crossing my fingers with the help of this book I can master vegetable gardening!

Charlotte teaches canning, pickling, and drying. I have never canned, pickled, or dried and I am excited to attempt them all!

Several years ago, I was very into making bread for my family. It is a process but can be a great money saver. I plan to start making bread again.  I am very intrigued by some of her recipes like; Buttermilk Potato Bread and 3-Grain Bread. I will have to let you know how they turn out! 

Modern-Day Pioneer shares a wealth of practical knowledge for making your own beer, soaps, candle making, and homemade cleaning supplies. Learn how to use herbs to aid in healing. Sew quilts, hem pants, add buttons, and fix holes and tears in you and your family’s clothes.

The book’s appendix is a wonderful quick view resource. Learn vegetable yields and plantings, vegetable watering and fertilizing needs, along with a very handy standard U.S./metric measurement conversion.

Disclosure: I received The Modern-Day Pioneer free of charge for my honest review and opinion.

If this book interests you please use the link below to purchase the book. I will receive a percentage of the sales - this will help me to continue to provide free craft tutorials and reviews.

September 20, 2011

Halloween Table Decor with Party Favors

Create "spook"-tastic Halloween Table Decor using natural items like branches, recycled glass jar, and even popcorn kernels! 


Add bottle cap charm necklaces, they work great to decorate the tree and are an amazing party favor!  Give the bottle cap charm necklaces as a Classroom Party treat or even as a healthy alternative to giving candy to trick-or-treaters.  All ages will love these festive Halloween Necklaces!


Visit my blog post at Crafts Unleashed for the full tutorial!

February 24, 2010

No Sew Woven Ribbon Purse

This woven purse is an easy craft for all ages to make.  This purse requires no sewing and only a limited amount of materials.

The template for weaving the purse is made using cardboard and the only materials needed is yarn or ribbon.  An optional weaving needle is not needed but can make it easier especially for young children.

Cut a piece of corrugated cardboard 8 inches wide by 6 inches. Along the top of the cardboard cut slits every 1/2 inch. You should have a total of 15 slits across the top. Then on the bottom right hand corner ¼ inch from the edge cut another slit.

To begin weaving start at the first slit on the top left. Measure your ribbon 2 inches in and place it through the slit at the 2 inch mark. Wrap the ribbon completely around your cardboard loom; back to front and through the first slit. Next, pull the ribbon across the back to the second slit. Then, front to back and through the second slit, again. Next, pull the ribbon across the front to the third slit. This time back to front through the third slit, again. With each slit alternate front to back forming loops across every other slit.

Finish the loom by pulling the ribbon down from the fifteenth slit to the bottom right slit. You should have 15 strips of ribbon on the front and 16 strips of ribbon on the back.

Begin by using the ribbon on the bottom right slit to weave ribbon through the strips. Weave both front and back of your loom. If you want to change the color of your ribbon just tie it on. When you have reached the top of your cardboard loom tie your woven ribbon to the 2 inch ribbon you left hanging down at the first slit and trim.

To detach your purse simply take the loops (that you formed with your ribbon) off of the cardboard slats and pull the cardboard out through the opening.

Attach ribbon at the top left and right of the purse to form your handle.

For detailed pictures of the weaving process click here. The purse made was a Woven St. Patrick's Day Purse with Marabou Trim and Beaded Handle.

AllCraftSupplies.com


February 9, 2010

Valentine's Day Classroom Craft - Personalized Charm Necklace

I have 17 little first graders that are depending on me to come up with an easy classroom craft for Valentine’s Day. I like the crafts to be mess-free (for the teachers), easy (because “hello” they are six yrs old), and personalized (for the children).

The craft I have planned is this fun personalized Valentine’s Day necklace that they can either keep or give to their mom or grandmother.


First, I plan to pass out small plastic cups filled with beads for each of the children. I will then pass out pre-cut lacing cord with one of the ends looped so that the beads will not fall off.


Children will have fun choosing their own necklace pattern and looking at the variety of beads. Once necklace cord is beaded I will come around and thread the lace cord thorough the loop and then loop the other end. The necklace can easily fit over the head and the two loops will keep the necklace from coming undone.


Lastly, I will surprise each of the students with their own personalized charm. I used their school pictures (often the school office keeps them on file) glued them onto scrapbooking paper and then onto stiff felt. I hole punched the sides to attach sparkly brads and the top to attach a lanyard hook.


Help children attach their charm to their necklace using the lanyard hooks. Lanyard hooks are very easy to pinch open so they may not need help.


February 7, 2010

Valetine's Day - Chocolate Hershey Roses

Bringing chocolate and roses together into one is the perfect combination!

I have seen many different instructions to make chocolate roses but I needed to design one that was simple and elegant. I made over a hundred of these roses for a baby shower a year ago and that is why I came up with these roses. I needed a design that was not too time consuming.

There are many different variations that can be done to make these roses perfect for many occasions (just change the ribbon color): baby showers (boy or girl), bridal showers, weddings, Easter, St. Patrick’s Day, and (of course) Valentine’s Day!


Materials Needed:
• Floral Stems
• Floral Tape
• Foiled Hershey Kisses
• Saran Wrap
• Ribbon for Roses
• Foliage (optional)
• Tissue Paper (optional)

Instructions:
Place two Hershey Kisses bottom to bottom. Put them in the middle of a piece of Saran Wrap approximately 6 inches long by 2 inches wide. Tightly wrap the kisses along the top. Place a floral stem at the bottom and finish wrapping the kisses with the Saran Wrap; including the tip of the floral stem.


Hold everything together by wrapping the base of a kiss and the top of floral stem with floral tape. Wrap tightly.


Cut a piece of ribbon 10 inches long. Fold down a corner of the ribbon forming a triangle. Start with the end point of the triangle and fold it around the base of the bottom Hershey Kiss. Holding the ribbon tightly continue to wrap around the kisses. To form the petals of the ribbon twist the ribbon when wrapping. Once the petals are completely formed take the end piece of ribbon and fold it down towards the base of the flower.

Wrap floral tape around the entire base of the flower securing the end pieces of ribbon.


Add foliage and ribbon to the roses for a nice finished look.


 For More Valentine's Day Post:

Valentine's Day - Easy Inexpensive Gifts for all Ages 

Valentine's Day Home Decor Crafts 

To learn more about me:

About Me: My Crafty Side 


HansonEllis

Add to Google Reader or Homepage

February 3, 2010

Valentine's Day Home Decor Crafts

Decorating for Valentine’s Day does not have to be expensive with these fun crafts that I have come up with.

For Ambiance: Use thumb tacks to shape a heart into a pillar candle.


Centerpiece: Fill a glass bowl with tamales and place a flameless tea light in the center.


Table Setting: Attach bows onto wooden napkin holders. Add adhesive gems to the side.


Decoration: Staple faux rose petals onto a cardboard wreath form.


Pillow: Make a “No Sew” Heart Pillow for your couch


Visit C4K555.org click on the side bar entitled, "Valentine's Day" to download the craft instructions.
Visit related blog posts: Crafters 4 Kids


Share


Family Craft Night - Reading and Recycling

The wonderful thing about crafting with your children is that it gives you a chance to talk and interact with them.  To see their little imaginations at work is absolutely priceless! 
One of my favorite crafts is the “Piggy Bank” craft.  Not only do children get to design their own piggy bank but they get to use recycled materials to do it.  This craft teaches children the value of saving money and be environmentally consciences.


I love doing crafts that involve children’s books.  The love of reading is one of the greatest gifts that a parent can give their children.  I designed a craft centered on the book, “The Ugly Duckling” by Hans Christian Andersen.  Visit your local library to find the book.  Begin by reading the story to your children and then follow the instructions for making a swan out of a recycled water bottle.

Visit C4K555.org click on the side bar entitled, "Family Night" to download the craft instructions.
Visit related blog posts: Crafters 4 Kids


December 12, 2009

Day 12 Homemade Gifts Decorated Suet Feeder

This is one of my favorite homemade gifts. It is very inexpensive, unique, and so simple. Purchase a Wire Suet Feeder & Suet Cake at your local bird feeding store, hardware store, or online at Duncraft.com

Decorate the front of the Suet Feeder with faux pine branches, twine, and floral picks. The gift recipent can remove the decorations off the front and then hang their winter bird feeder outside for the birds to enjoy!

No need to wrap this present just decorate the front! A Guide to Bird Feeding Book is the perfect addition to this gift.


December 11, 2009

More Holiday Gifts

It is not about the money spent; but rather about the thought and time that goes into gifts this holiday season.

Here are some easy inexpensive gifts to make for your loved ones, neighbors, teachers, and co-workers.

All of my craft instructions can be found at Crafters4Kids.


Day 11 - Dog Bowl & Treats for your furry friend


Day 10 - Book and Bookmark - Perfect gift for a Teacher or Grandparent Best of all kids can easily make the bookmark, with no mess!


Day 9 - Holiday Gift Card and Christmas Tree Pin - Perfect Gift for Grandma Children can easily make the card and pin.


Day 8 - Fun Reindeer Ornament made using pipe cleaners, terra cotta pot, and googly eyes.


Day 7 - Mulling Spice in a Mug. Boutique style gift perfect for friends!


Day 6 - Jelly Jars filled with Candy and Decorated with Gems around the band.


Day 5 - Homemade playdough children can make for their classmates. Wrap the playdough in cloth and attach cookie cutters.


Day 4 - Reindeer Apple "Healthy with a Little Sweet"


December 3, 2009

No Sew Holiday Pillow Day 3 - Homemade Gifts

Easy "No Sew" Holiday Pillow makes a wonderful gift or looks great on your couch for the holidays. Perfect craft for children; no sewing necessary!


Step-by-step pictures instructions at C4K555.org


December 2, 2009

Olive Oil & Dried Peppers Day 2 - Homemade Gifts

Here is a wonderful easy gift! Makes a perfect hostess gift or co-worker gift. I purchased small little bottles of olive oil at Big Lots for $1.50. I emptied the oil into a measuring cup placed dried red peppers inside and then put the oil back in. The oil is wonderful to cook with, use on sandwiches, or in salads.

For step-by-step picture instructions visit C4K555.org click on 555 Projects, Gift Decoration.


December 1, 2009

Holiday Coasters - Day 1 of Homemade Christmas Gifts

Every day I am posting a different gift that you can make for the holidays.

Holiday Coasters are an easy gift to make, perfect for teachers, co-workers, neighbors, and family members! Purchase unfinished coasters then paint and decoupage them.


For step-by-step picture instructions to make these coasters visit http://c4k555.org Look under the category 555 Projects "Holidays".


November 27, 2009

Easy Canvas Purse and Gift Bag

My daughter has yet another birthday party to go to this Sunday. We love going to the birthday parties but it seems like every other weekend we are attending one. I have tried to come up with craft projects that can be given as gifts to make it a little more economical. Here is my latest craft project - inexpensive present.

It can be used as a gift bag and later as a purse. It is very easy to make and requires very little crafting supplies. Click here for easy detailed instructions.


November 24, 2009

Not even Thanksgiving and I am ready for Christmas

In the crafting world you have to be a season ahead. So it is not even Thanksgiving yet and I am already in full Christmas Mode!

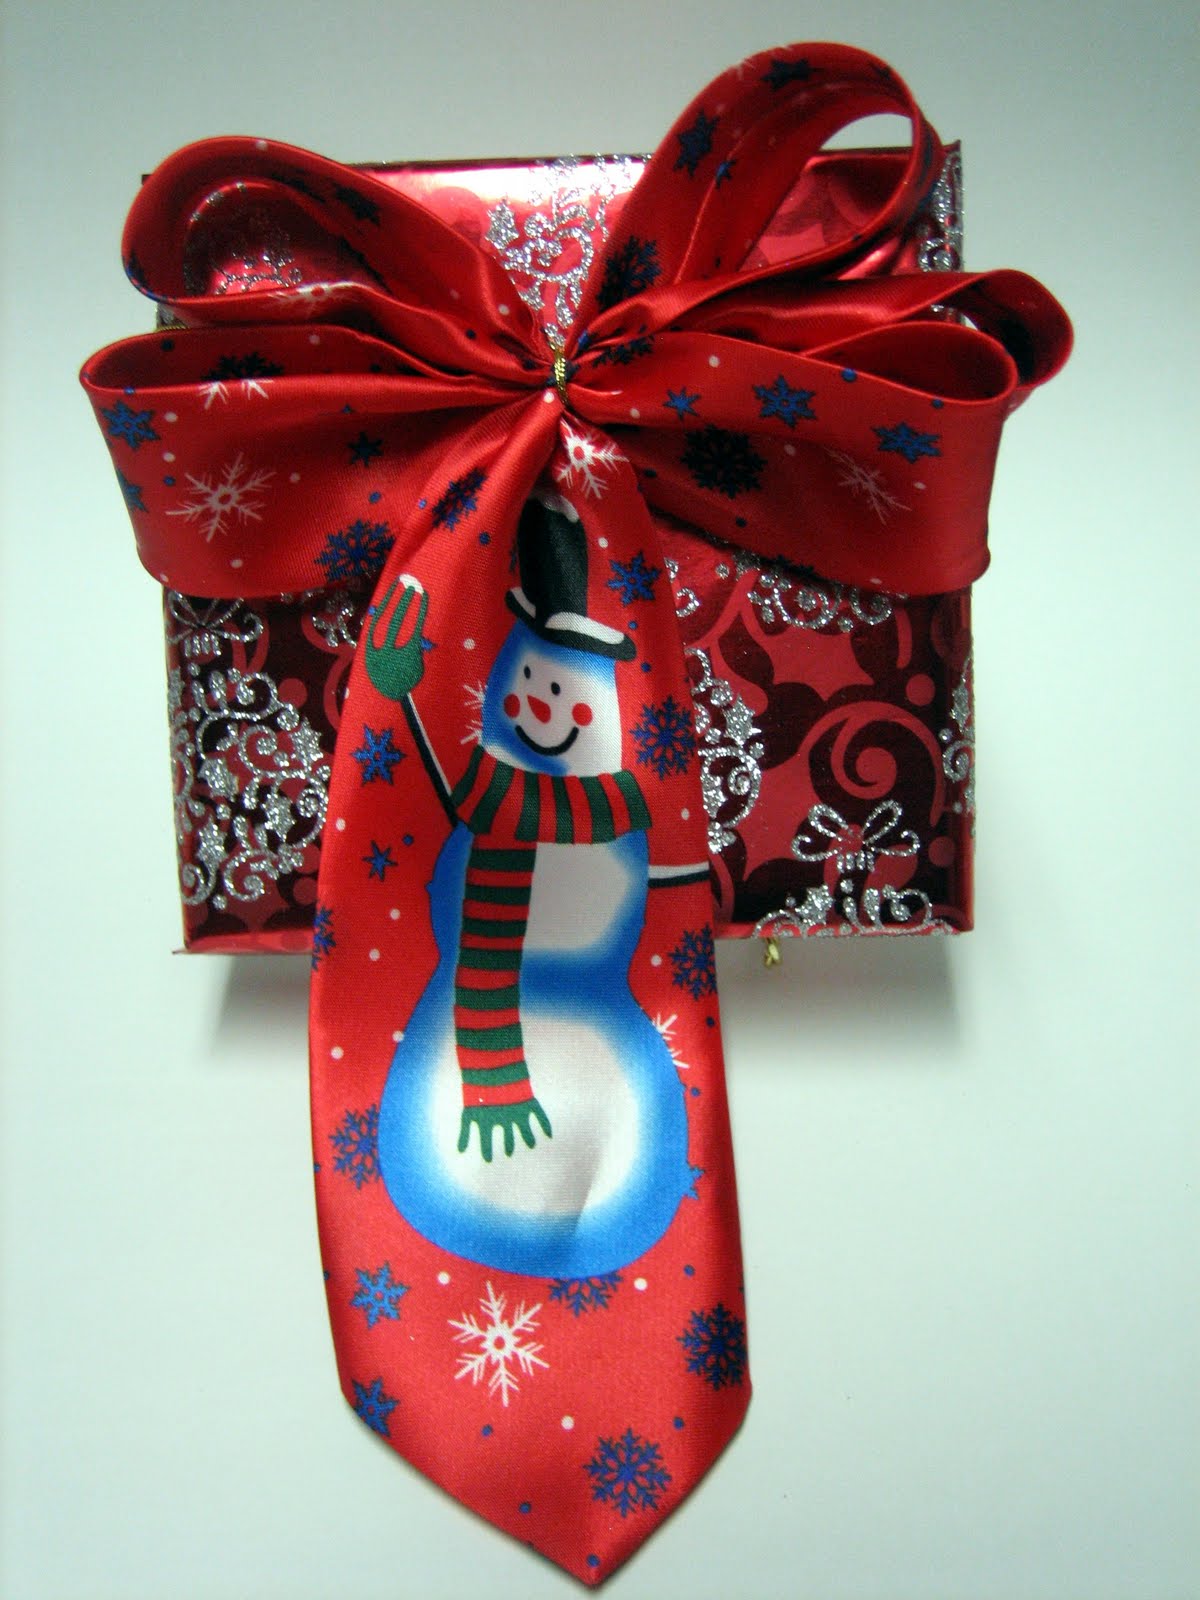
I spent the last couple of days coming up with creative ways to wrap a Christmas Package without traditional wrapping paper. Here are pictures of my creative crafts. For instructions visit C4K555.org

Cloth Gift Wrapping

Neck Tie Bow


Ice Cream Carton Gift Box

Apron Gift Wrapping


Brown Paper Bag Gift Wrapping


August 31, 2009

How to Make a Glasses Case (attaches right to the your belt)

I made this case for my son. When he is at school on the playground he likes to take off of his glasses and put them in his case. When he gets back to class he has his glasses right by his side, no searching necessary!

Visit link for step-by-step instructions plus pictures.


August 23, 2009

Back to School -- Crazy Pencils

In just a week my children will be off to school. I came up with a craft to get them excited about going back to school. Decorating pencils with funny faces!

Click on the link for easy to follow instructions.

August 13, 2009

Bridal Shower Gifts - Crafty Frugal

I will be attending a Bridal Shower this weekend. Here is my Crafty Frugal gift giving ideas!

A Canning Jar filled with Potpourri. Topped with fabric with ribbon trim. Then embroidered with their wedding date on the top.


Quilted front Place-Mats


I added to the basket; napkins and crystal napkin rings. Though in the future I will make my own napkin rings, I am thinking either wooden unfinished ones that I stain or beaded ones. More napkin ring instructions to follow -- for sure!


Basket finished with some beautiful bows that I made oh so easily with my Bowdabra!

Sarah Forhan Enterprises


Email Updates Daily by Feedburner

Enter your email address:

Delivered by FeedBurner