
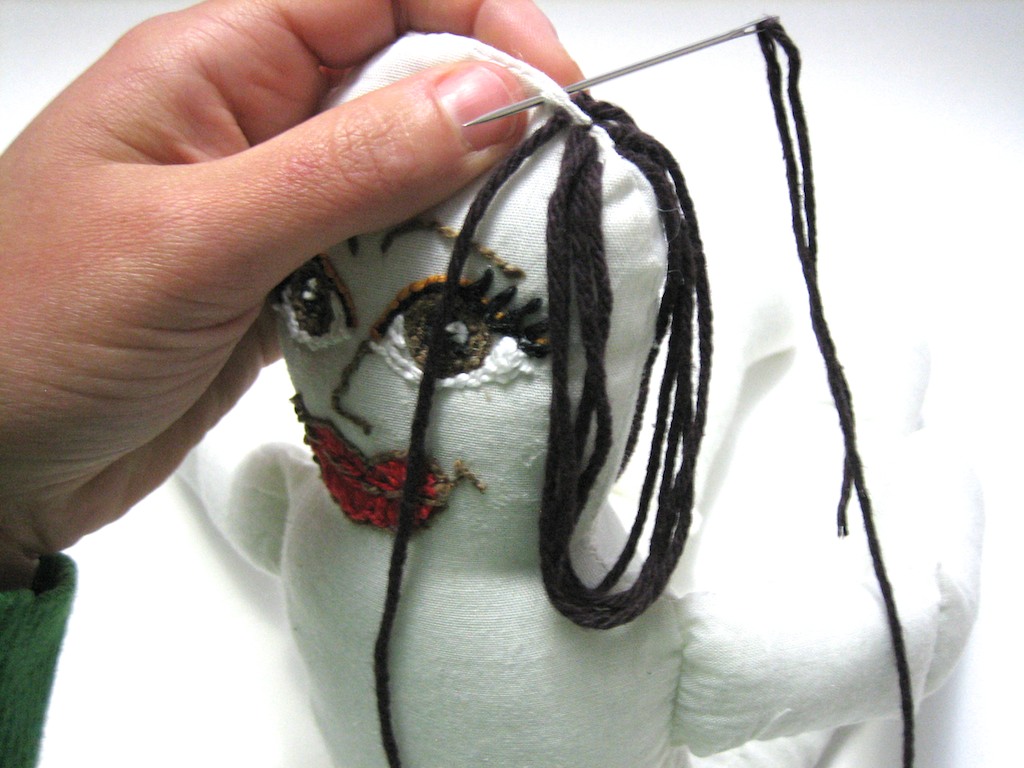
To add hair I used yarn and a yarn needle.
To begin with I cut couple yards of yarn from the skein. I then threaded the yarn through the seam of the doll's head and looped it to the desired length.

I looped the hair on each side of the doll's head, leaving the part off center. Each time I need more yarn I cut a couple of yards from the skein.
Both sides of the doll's head now have hair.

Next, I needed to add hair to the back of the doll's head. Before adding hair to the back of the head move the side hair frontwards so that you can completely get to the back of the head. Then, it is just a matter of looping the yarn along the seam.


Once, the sides and back of the doll's head have hair it is just a matter of looping the yarn around the top seam.

The doll's hair is now finished. Using this method you can make the doll's hair as long or as short as you want. If the hair is longer than shoulder length I recommend placing the hair in a ponytail to keep if from getting caught on anything.

Craft Materials Available at: Consumer Crafts
Craft Designer: Sarah Forhan
Follow on Twitter @sarah_forhan
Sewing & Crafting with Sarah on Facebook
Stumble It:
No comments:
Post a Comment